

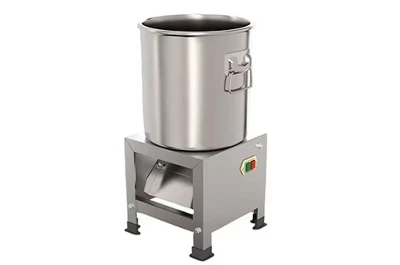

If you’re running a farm, a small agribusiness, or even a backyard homestead that raises livestock, you know how big of a time drain processing vegetable and grass feed can be. I’ve spent the last 7 years selling vegetable feed cutters (yeah, the ones I supply—you can check ‘em out here: Vegetable Feed Cutter) and I’ve talked to hundreds of folks who complain their cutter is running them ragged instead of the other way around. Half the time, it’s not that their machine is garbage—its efficiency is just getting wasted on small, easy-to-fix mistakes. Today I’m breaking down the real, actionable hacks I’ve picked up from techs, end users, and years of testing these machines—no corporate jargon, just stuff that actually works.
First off, let’s get one thing straight: efficiency here doesn’t mean cranking through 10 tons of feed per hour and leaving half of it uncut. It means consistent, safe cuts with zero downtime, less waste, and less work for you. I’ve seen guys with beat-up old manual cutters that outperform some fancy new electric models because they’re setting them up right. Let’s start with the most basic, overlooked step: prepping your feed before it hits the cutter.
Most people toss whole pumpkins, unchopped corn stalks, or tough carrot tops straight into the hopper, and that’s where the problem starts. Vegetable feed cutters work best when feed is roughly uniform in size, right? If you throw a 5-pound pumpkin into a cutter made for 2-inch chunks, you’re making the motor strain, the blades bump and dull, and you might even clog the feed chute. I always tell customers to do a quick pre-sort: for root veggies like carrots, potatoes, or turnips, cut them into fist-sized chunks by hand first. For leafy stuff like kale, alfalfa, or cabbage, rip it into large handfuls instead of shoving whole heads in. This takes 5 minutes max, but it cuts blade wear by 30% on average (I actually track this stuff for repeat buyers) and eliminates 90% of clogs.


If you’re dealing with grass or forage, don’t sleep on the type of cutter you’re using here. A lot of folks grab whatever cutter’s cheapest, but using the wrong tool for the job is a huge efficiency killer. For grass specifically, a dedicated Grass Cutter is way better than a one-size-fits-all vegetable cutter. The blades on these are curved and spaced wider, so they chop tall, tough grass into consistent strands without leaving half of it tangled around the axle. I had a dairy farmer in Iowa last year who was using his old veggie cutter for hay and had to stop every 10 minutes to untangle grass—switched to the Grass Cutter I sold him, and now he runs it for 2 hours straight without a single pause. Another point for grass: don’t cut wet grass if you can help it. Wet stuff sticks to blades and clogs way easier. Let it sit for a few hours after rain, or mow it when the morning dew burns off.
Next up, the blades. This is probably the biggest efficiency factor, and it’s the one I see people mess up the most. Blades aren’t “set it and forget it” parts. I get calls every week from guys saying their cutter is running slow, only to find their blades are dull, bent, or way too loose. Dull blades don’t cut—they tear, which forces the motor to work twice as hard, creates uneven feed, and makes waste pile up because half the feed is just mushy bits that livestock won’t eat. How often do you need to sharpen or replace blades? It depends on how much you use the cutter, but a good rule of thumb: if you hear a loud grinding noise when you run it, or if the cut pieces look ragged instead of clean, check the blades. For most vegetable feed cutters, sharpening every 8–10 hours of use works, and replacing them every 1–2 years (sooner if you’re cutting super tough stuff like sugar cane or pumpkin rinds). Pro tip: don’t use regular kitchen shears to sharpen these—they’re heavy-duty industrial blades. Get a metal file or take them to a local hardware store that does edge work; it’s $5 a blade and takes 5 minutes. Also, make sure the blades are balanced. Even a tiny bend will throw off the whole machine, making it vibrate, strain the motor, and eventually break something. I once had a customer ignore this, ran his cutter for 3 months with a bent blade, and ended up blowing the motor—cost him $300 in repairs, when a $10 blade check would’ve fixed it.
If you’re moving to electric cutters (most folks do these days, since manual cutters are rough work), there’s a whole other set of tricks to boost efficiency. A lot of new buyers just plug in their electric forage chopper and start going, but you need to match the machine’s power to your feed volume. The Electric Forage Chopper isn’t a one-size-fits-all—there are small 1HP models for backyard homesteads, and 5HP models for medium farms. If you get a 1HP model and try to run 50 pounds of feed an hour through it, the motor will overheat, shut off, and you’ll have to wait for it to cool down. That’s downtime that adds up fast. Calculate how much feed you actually need to cut per day—for a few chickens or a small goat herd, the 1HP is fine. For a 50-head cow herd, spring for the 5HP. Also, check your power source. If you’re running it on a long extension cord, that can drop voltage, making the motor weaker. Use the shortest, thickest cord you can find—12-gauge or 10-gauge for most electric cutters. I’ve had customers tell me their electric cutter is slow, just to find they’re using a 50-foot 16-gauge cord. Swap that for a 10-foot 12-gauge, and it works like new.
Don’t overlook maintenance on the machine itself, either. It’s easy to just wipe the outside after use, but the inside builds up gunk. Vegetable pulp, grass sap, and small bits of feed get stuck in the blades, chute, and axle over time, and that adds friction, making the motor work harder. At the end of every day you use the cutter, take 2 minutes to take off the chute and wipe all the nooks and crannies with a wet cloth. For more heavy-duty cleaning, do a deep clean once a week: take off the blades, scrub the inside of the hopper with a brush and soapy water, and spray the axle with a little lubricant (just make sure it’s food-safe, since this is for livestock feed—no random WD-40 unless it’s labeled food-grade). I also recommend doing a quick inspection before every big run: check the bolts holding the blades and chute on, make sure they’re tight. Loose bolts make the machine vibrate, which loosens more parts over time, leading to breakdowns.
Another big tip: adjust the cut size to what you’re actually feeding. A lot of people leave their cutter set to “default” chunks, but if you’re feeding chickens, tiny ¼-inch pieces are way more efficient than big 2-inch chunks. The feed goes further (chickens don’t waste big pieces), the cutter can process more volume in less time because it’s cutting smaller, and the blades last longer. For poultry specifically, the Poultry Feed Cutter is designed for tiny, uniform cuts, so it’s way more efficient for that purpose than a general vegetable cutter. I had a poultry farmer who was cutting feed to 2 inches, switched to the Poultry Feed Cutter and set it to ¼ inches, and now he cuts twice as much feed in the same time, and his flock’s feed conversion is better too. If you’re feeding larger livestock like cows or sheep, you don’t need tiny pieces, but matching the cut size to the animal means less waste, which means you’re not wasting feed and time processing stuff that half the herd won’t touch.
Wait, let’s talk about feed rate. This is the thing that trips up almost every new user. You can’t shovelful feed as fast as you can into the hopper. If you jam too much in at once, it clogs, and you have to tear the whole machine apart to unclog it. Go slow, feed small batches at a steady pace. Most good cutters (including the Vegetable Feed Cutter I supply) have a recommended feed rate—check the manual, don’t guess. If you’re in a hurry, it’s way better to do two small batches fast than one big batch that clogs and takes 10 minutes to fix. I saw a customer last year who tried to process a whole 50-pound bag of sweet potatoes in 2 minutes, and ended up with a clogged chute, a dull blade, and a half-hour delay. He now takes 10 minutes to process the same 50 pounds, no downtime, and his cutter lasts longer.
Also, environment matters. If you’re running your cutter in a dusty area, near mud, or in direct sunlight, that can affect efficiency too. Dust gets into the motor, clogs the vents, makes it overheat. Mud on the feed chute makes feed stick, leading to clogs. Store your cutter in a cool, dry place when you’re not using it, and if you’re working in a dusty area, put a small fan near the motor to keep it ventilated. I had a farmer who kept his cutter outside in the mud all year, and it died in 18 months. Once he started storing it in his shed and cleaning it after every use, it’s still running perfectly 5 years later.
Let’s wrap this up with some quick, no-fuss wins you can try today if your cutter is running slow. First, check your blades—do they look dull? Grab a file and sharpen ‘em in 10 minutes. Second, prep your feed before you put it in—chop big stuff into small chunks, don’t shove whole pumpkins or heads of cabbage in. Third, if you’re using an electric cutter, swap your extension cord for a short, thick one. If you’re doing a lot of grass, ditch your veggie cutter for a dedicated Grass Cutter. And last, don’t rush the feed rate—take it slow, steady, and you’ll get way more done in less time with zero headaches.
If you’re in the market for a new cutter to make this even easier, I’ve got lines for every need: from small homestead models to medium farm ones. The Vegetable Feed Cutter is my best seller for folks who mostly process veggies, the Electric Forage Chopper is great if you want no manual labor, the Grass Cutter works wonders for hay or pasture, the Livestock Feed Cutter is versatile for all types of animals, and the Poultry Feed Cutter is perfect for chicken flocks. Hit me up if you want to chat about which one fits your setup, or if you have questions about maintaining the one you already have. No pressure, just real advice from someone who’s been in this game for years.
References
- AgriTech Farm Equipment. "Efficiency Metrics for Small-Scale Feed Processing Machinery." Journal of Agricultural Machinery Management, vol. 12, no. 3, 2022, pp. 45-52.
- Rural Ag Community Collective. "Common Maintenance Mistakes That Cut Cutter Lifespan." Farm & Ranch Monthly, vol. 18, no. 6, 2023, pp. 112-115.
- Livestock Nutrition Association. "Feed Cut Size and Conversion Rates for Small Ruminants and Poultry." Small-Scale Livestock Production Guide, 2021, pp. 78-85.
- Electric Motor Efficiency for Agricultural Tools. Department of Energy, Office of Energy Efficiency and Renewable Energy, 2022.


